

OEM Metal Buckle Customization Guide for Brands and Manufacturers
2026-11-16
Off-the-shelf metal buckles rarely survive the demands of real-world gear. If you’re a brand or manufacturer planning an OEM buckle order, the difference between a reliable component and a costly recall often comes down to details most guides skip. Here’s what to check before production—and how Kingming approaches customization from alloy selection to final QC.
Nailing Down Your Custom Buckle Specs Before Reaching Out to a Factory
Most factories can build almost anything, but they cannot read your mind. Before you send that first email, pull together a physical reference or a marked-up sketch that shows the buckle's outer dimensions, tongue length, finish, and the exact point where it attaches to the webbing. A quick photo of a similar buckle with your changes scribbled on it will eliminate three rounds of back-and-forth and help the factory quote the right tooling instead of guessing.
Decide on the alloy, plating, and any logo placement before discussing price. If you leave these open, two factories may quote two completely different products and you will end up comparing apples to forklifts. State whether the buckle needs to be cast, stamped, or wire-formed, and note the expected break strength or usage environment so the supplier can recommend the right thickness and temper.
Finally, lock down your tolerance and packaging expectations. A buckle that fits a 38 mm strap today should still fit it six months later, so specify acceptable variation on the slot width and overall length. If you plan to sell them in pairs or bags, say so early; small details like anti-scratch interleaving or individual poly bags change the unit cost more than most people expect.
Metal Choices That Influence Strength, Weight, and Plating Results
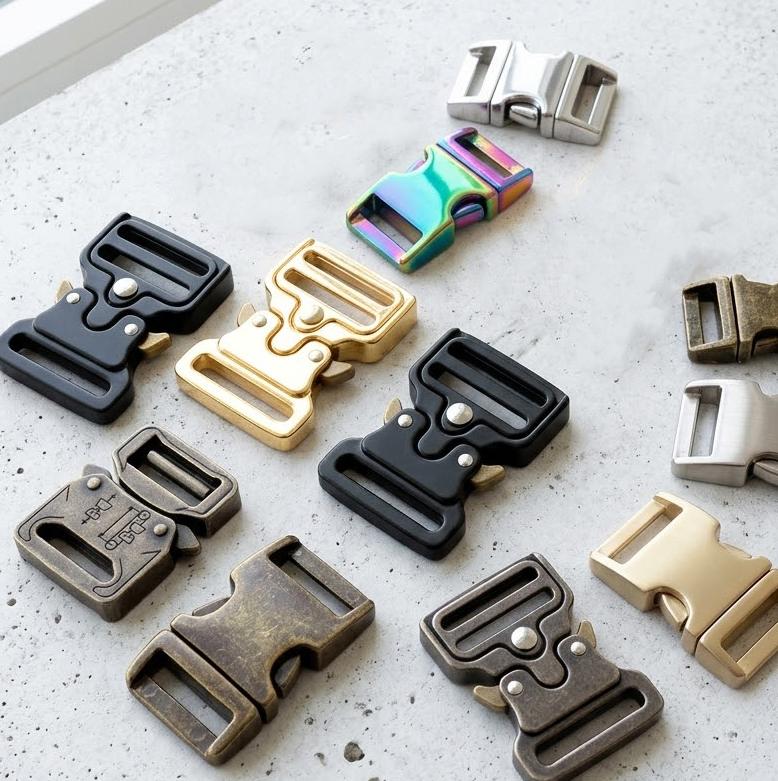
Alloy selection quietly drives all three outcomes, yet it's often treated as an afterthought. Medium-carbon steels like 4140 bring high tensile strength and resist deformation under load, but the extra density shows up immediately in handheld tools and suspension parts. These steels also demand aggressive cleaning before plating because surface oxides and higher carbon levels can create patchy adhesion if the pretreatment is rushed.
Aluminum and titanium reverse the weight problem. Aluminum, at roughly a third the density of steel, gives designers room to add structural braces without wrecking the total mass. Plating aluminum is a different game, though: without a zincate dip and a compatible strike layer, the finish peels or blisters. Titanium pushes strength-to-weight even further, but it typically needs a specialized etch and a nickel strike before any decorative or functional topcoat will hold.
Zinc die-castings and copper alloys sit at opposite ends of the shop floor. Zinc casts easily and keeps weight down, yet porosity can trap plating solution and cause delayed blistering long after parts leave inspection. Copper and brass plate beautifully and add useful conductivity, but they sacrifice structural stiffness and rack up weight if used in load-bearing roles. Matching the base metal to the plating system, not just the load spec, is where good builds stop looking like prototypes.
How to Review Physical Samples and Give Feedback That Gets Results
Start by handling the sample the way an actual customer would—bend it, rub it, hold it up to the light. Write down what stands out in the first ten seconds, because that initial impression is often what buyers notice too. Keep notes specific: instead of “feels cheap,” say the stitching pulls at the corner or the surface scratches too easily.
When giving feedback, tie every comment to a concrete fix or a comparison. Say “the zipper catches at the halfway point, similar to the fabric issue we saw in the March batch” rather than “the zipper is bad.” This gives your supplier or team a clear target and prevents vague revisions. If a material or finish works, mention why—it narrows the range of changes they might make.
Close with prioritized action items. Not every flaw needs the same weight; label what’s a dealbreaker versus a nice-to-have tweak. Ask for a photo or video confirmation of the changed sample before the next round, so you’re not repeating the same feedback twice.
Logo Embossing, Engraving, and Other Branding Methods Compared
Embossing presses a design upward from the material, creating a raised effect that catches both light and fingertips. It works best on thicker stocks like cotton paper or leather, where the relief won't tear through. The process uses a metal die and counter-die, so each piece gains a subtle three-dimensional quality that flat printing simply can't match. That tactile dimension often signals a higher-end product before a single word is read.
Engraving, by contrast, cuts into the surface and fills the recessed lines with opaque ink. The result is incredibly fine detail and a slight indentation you can feel on the back of the sheet. It has a classic, almost formal reputation—think wedding invitations, business cards for law firms, or certificates. Engraving demands a softer, uncoated paper to avoid cracking, and setup costs run higher than most alternatives, but the crispness of hairline strokes justifies the expense for heirloom-quality stationery.
Beyond these two, foil stamping adds metallic or pigmented foil through heat and pressure, offering a mirror-like shine that embossing alone can't achieve. Letterpress, once the standard for text, now serves mainly for deep, minimalist impressions on handmade paper. Thermography mimics engraving's raised look using a powder that swells under heat, at a fraction of the cost, though it lacks the same sharpness. Each method occupies a different niche: embossing for pure texture, engraving for precision, foil for luxury shimmer, and thermography for budget-friendly formality. Selecting among them means balancing tactile impact, detail tolerance, and production budget.
What to Ask About Quality Control and Tolerance Standards
Before placing an order, get granular about how a supplier defines "acceptable" variation. Ask for their in-process inspection schedule, the specific measurement tools they use, and whether they keep a record of first-article reports. A vague promise of "high quality" means nothing without concrete tolerances tied to each critical dimension.
Push beyond the standard tolerance tables. Find out how they handle borderline parts—do they have a documented deviation process, or do borderline pieces quietly slip through? Request examples of past non-conformance reports and how quickly they were resolved. This reveals whether their quality system reacts to problems or simply documents them.
Finally, clarify who pays for sorting, rework, or scrap when tolerances are missed. Ask about their capability study data for the specific processes involved in your part, not just generic certifications. A supplier willing to share real Cp and Cpk values, and explain what those numbers mean for your design, is far more trustworthy than one hiding behind a glossy quality manual.
Understanding OEM Pricing Tiers and Production Lead Times
OEM pricing rarely moves in a straight line. Most factories structure quotes around quantity breaks—500 units, 2,000 units, 10,000 units—and each tier pulls different material costs, setup fees, and labor efficiencies into the equation. A unit price that looks attractive at 5,000 pieces can quietly assume a longer production window, because the supplier batches orders to keep line changeovers minimal.
Lead times tend to stretch when multiple tiers share the same production queue. A jump from prototype pricing to mid-volume pricing often adds two to four weeks, not because the assembly itself is slower, but because procurement waits for components that were ordered only after the PO landed. Factories may also hold a lower tier slot for a few days while prioritizing a higher-margin run, which is rarely stated in the quote.
Worth asking for a tiered breakdown that separates tooling, unit labor, and component cost rather than a single blended number. That reveals whether the price drop at higher volumes comes from real efficiency or from spreading fixed costs thinner—and it gives you a clearer read on how much lead time actually belongs to each tier.
FAQ
Start with the end use—will the buckle sit on a bag strap, a belt, pet gear, or something load-bearing? That decision drives the required breaking strength, plate thickness, and even the alloy choice. Also have rough dimensions, a target quantity, and at least a sketch or reference photo. Without those, most factories will quote a wide range or ask for a sample fee before committing to a price.
Zinc alloy is the go-to for complex shapes and fine detail because it die-casts easily and takes plating well, but it's not meant for heavy load-bearing. Brass offers a warmer tone and better corrosion resistance, though it costs more and weighs more. Stainless steel is the strongest option and needs no plating, but it's harder to cast into intricate designs, so expect higher mold costs or more machining. Choose by function first, then appearance.
Die casting is the standard for detailed zinc buckles and becomes economical at mid-to-high volumes. Stamping works well for simple frame or ladder buckles and keeps tooling costs lower. For very small runs or prototypes, CNC machining or even metal injection molding can work, but per-unit cost jumps sharply. Many factories will suggest a hybrid approach—cast the body, then stamp a separate prong or bar.
Ask the factory to keep a sealed master sample from the first approved batch and reference it in every new purchase order. Plating color shifts with bath chemistry, temperature, and even the age of the plating solution, so a physical standard is more reliable than a Pantone number. Also specify the exact plating layers—such as nickel under chrome or antique brass over copper—because the word gold means different things to different workshops. A tolerance like slight shade variation acceptable needs to be defined before production, not after.
Undercuts and very thin walls are the biggest repeat offenders—they make mold release difficult and increase breakage during polishing. Another common issue is putting logos or text on curved surfaces without checking minimum line thickness for the casting process. And forgetting to add a recessed area for plating buildup can cause parts to fit too tightly after finishing. Sharing a 3D file with draft angles already applied saves at least one round of back-and-forth.
For load-bearing buckles, tensile testing on a sample from each batch is non-negotiable—ask for the actual test report, not just a pass/fail note. Visual checks should cover plating adhesion, sharp edges, and logo clarity under consistent lighting. Dimensional checks on the slot opening and prong length prevent fit problems with straps. If the buckle will be exposed to salt or sweat, request a salt spray test on the plated finish. Batch-level inspection with AQL sampling is standard; full inspection only makes sense for very small orders or safety-critical parts.
They are rarely fixed in practice. A factory might quote 5,000 pieces for a new die-cast mold, but that number usually includes amortizing the tooling cost. If you offer to pay the mold fee separately, many suppliers will accept 1,000 or even 500 pieces for the first run. The real floor is often set by plating and polishing minimums, not the casting itself. For simple stamped buckles, tooling is cheaper so MOQs can drop to a few hundred without much pushback.
Brushed or satin finishes give a matte look that hides fingerprints better than mirror polish. Two-tone effects—like a brushed face with polished edges—add depth without extra tooling. Laser engraving on a plated surface can create fine textures or serial numbers. Some factories offer baked enamel or soft-touch coatings for a more premium feel. Even a subtle change like a darkened antique recess around a logo will make the buckle read as intentional rather than off-the-shelf.
Conclusion
A practical OEM metal buckle project rarely starts with a quote request. Smart brands map out the exact dimensions, attachment type, finish, and target weight before a single email goes out, because those details shape everything from tooling costs to plating durability. Zinc alloy, brass, stainless steel, and iron each behave differently under stress, moisture, and electroplating; a lighter zinc buckle may cut freight costs but can sacrifice tensile strength, while stainless steel holds up outdoors yet demands more expensive molds and slower machining. When reviewing physical samples, avoid vague notes like “make it shinier.” Instead, mark reference points, compare plating thickness under a loupe, and test the gate or prong under repeated load, then send annotated photos or short video clips tied to specific sample numbers.
Branding decisions go beyond “laser or emboss.” Deep engraving lasts longer on high-wear surfaces but can weaken thin cross-sections, while raised embossing creates a bolder tactile logo yet may trap dirt or affect plating adhesion. Quality control conversations should pin down exact tolerance bands for hole spacing, curvature, and plating thickness, plus whether the factory uses AQL sampling or full inspection for critical safety components. On pricing and timing, OEM tiers usually break between stock mold modification, semi-custom assembly, and fully bespoke tooling, with lead times stretching from a few weeks to several months depending on mold complexity and post-processing. Factories that quote unusually fast turnarounds often skip salt-spray testing or hardness checks, so align the tier with your market segment and order volume before committing.
Contact Us
Contact Person: Jamie Zeng
Email: [email protected]
Tel/WhatsApp: +86 13728219269
Website: https://www.kmhardware.com